Tuesday, March 2, 2010

Clover Mask


I ended up making my own mask for a challenge when I couldn't find one I liked so thought I would share with you all. Just click on the mask to make it full size then right click and save.
Hugs, Staci

Thursday, February 25, 2010

You know you want me


It seems like it has been forever since I did a template so decided to do one again. If you d/l please leave me some love!
Hugs, Staci


You know you want me

Tuesday, February 2, 2010

Remember When....


Remember When...

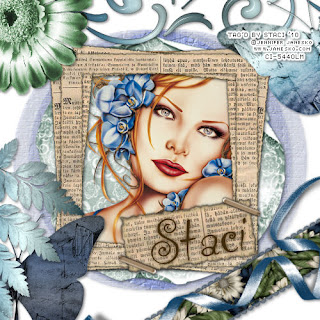
Artwork I used is a beautiful tube by the talented Jennifer Janesko
You can buy it at CILM
Scrap kit used is Genea's Notebook by the beautiful and talented Carita
You can Purchase it at MPT
Mask is by the ever talented Vix it is Vix_Mask11 which you can d/l from her
site vixpsp Under goodies

All set? Here we go!!!
Open a new image 500X500 Transparent
Open paper6 and copy and paste as a new layer
Layers> New Mask Layer from image and scroll down to find Vix_Mask11
Source luminance checked Inverted mask data unchecked and hit ok
Layers>Merge>Merge group

ok now here is what I did but you can go your own way if you want!
I opened up tagback 2 and resized 90% (Image>Resize>90%) and copy and pasted
it onto the mask layer
Open frame and copy and paste as a new layer
Open your tube and copy and paste as a new layer
Put it under you frame and resize to the size you like

Then I opened flower3 and put in the upper left hand corner (No resizing)
Then I opened butterfly1 Image>Free Rotate then checked Left and Free 30
All layers and Rotate single layer around canvas center unchecked and hit
ok I placed this in the upper right hand side (again no resizing)

Then I opened butterfly 2 and copy and pasted as a new layer and moved it
down on the bottom left hand side
I opened leaf1 and then did Image>Flip and then copy and pasted as a new
layer and moved it down over the butter fly on the lower left hand side

Then I opened ribbons and copy and pasted as a new layer then hit Image>
Free Rotate and then hit ok (should still be on the left free 30) and moved
the the lower right hand side

Then I opened doodle2 and copy and pasted as a new layer
I dragged it down under the green flower
Then I put a drop shadow of V and H 2 Opacity 40 blur 5 color black on
everything
Layers>Merge>Merge Visible

Now very important at this time you have to put your artist info in!!!

Use a scripty font to put your name on ( I duplicated the name and on the
original put a gaussian blur of 3 on it)

Either merge visible for transparent background or merge all for a white
background and that is it!!!

I hope you enjoyed doing this tut as much as I enjoyed writing it!
Thanks and many (((HUGS)))
Staci

Thursday, January 14, 2010

WOOHOO! My scrap kit was used in a tut!!!!


I put this thru her before but it must not have taken....I am soooo sorry Cathy...(My puter sucks LOL) Everyone please go visit her site! She has wonderful tutorials including the one she did for me! Thank you so much Cathy! You were an angel to do this for me!!!! (((HUGS)))
Here is the link to her wonderful site! Her tutorials are very easy to follow! If I can do them anyone can do them!

LadyHawwkdesigns

Friday, January 8, 2010

New PTU Tut~Wired


WIRED!

Artwork by Justice Howard .
You must have a license to use her work.
You can purchase at MPT http://www.mypsptubes.com/
Scrap kit Wired by Crazy Carita
can also be purchased at MPT http://www.mypsptubes.com/
Mask 431 is by Vix and you can
get at her blog http://vixpsp.blogspot.com/

Lets get started!

Open a 600X600 Transparent New Image
Open paper 7 and copy and paste as a New Layer
Layers>New Mask Layer>From Image and use the scroll bar
to find Vix_Mask431 Source luminance checked
Invert mask data unchecked
Layers>Merge>Merge group
Open frame (first one) and copy and paste as a New Layer
Grab your lasso tool (Freehand, Add(Shift), Feather and Smoothing 0
Anti-alias checked) and trace around your frame. I did as close to the
middle as I could.
Open paper 3 and copy and paste as a new layer. Selections>Invert
and hit delete once on your keyboard and move this under your frame.
Open necklace 1 and copy and paste as a new layer. Image>Mirror and
position like mine. I wanted it to look like it was weaved in the frame so
I duplicated and used the eraser tool to remove some of the necklace and
make it look that way. Open Butterflies resize 85% and copy and paste
and place on the right hand side of the frame. Open leaves2 resize 50%
and copy and paste and place on the left hand side of the frame
Open Ribbon 4 and copy and paste as a new layer and move it down above your mask layer.
Layers>Duplicate then Image>Mirror then Image>Flip
Open your tube and copy and paste and move to the top (Layers>Arrange>Bring to the top)
I moved it up slightly. Open wordart and copy and paste as a new layer and move just below your tube.
Layers>Merge>Merge Visible
At this point you put on your copyright info and license info!!! This is a must!!!
Use a funky font of choice and you are done!
I want to thank you for doing this tutorial and I hope it was fun for you as much as it was for me!
Hugs, Staci

Tuesday, January 5, 2010

My first Scrap Kit!!!!!


It is FTU and my little pride in joy! I would love to hear what you all think of it and if you use it in a tut or that I would love the link so I can see what you all did with it!
Hugs, Staci

Oh yeah there is way more stuff in the kit than what I could fit in the preview!


Butterflies in Flight

Friday, January 1, 2010

Magical.....


FTU Tutorial Magical....

Tube of choice. I used Jamie Kidd Tube from CILM Christmas Tube kit (www.cilm.com) You must have a license to use.
Scrap kit is Vix's No apologies (http://vixpsp.blogspot.com/) search under freebies She has such wonderful stuff that she shares. Thank you so much Vix!

Here we go!
Open a 600X600 New Canvas with Transparent Background
Open Vix_NAElement 7
Resize 85% bicubic checked
Copy and paste onto your new canvas

Using your magic wand
Mode-Replace
RGB Value
Tolerance and Feather at 0 Anti-alias checked
Click the inside of the frame
Selection>Modify>Expand 2
Using Vix_NAPaper9 copy (go ahead and close) and paste as a new layer
Selections>Invert Now at this point you need to make sure you are on the Paper 9 layer and hit Delete once on your keyboard
Selections> Select None and move the paper below the frame
This point is optional but I like sparkly, starry stuff LOL
Open Vix_NAElement 12 copy (go ahead and close) and paste as a new layer Move under the frame
Open Vix_NAElement 11 copy (go ahead and close) and paste as a new layer
Move it down to the bottom part of your frame (See mine for placement). Duplicate and Merge down. Duplicate again and move to the top part of frame (Again see mine for placement)
Open Vix_Element4 Copy (go ahead and close) and Paste as a new layer Move to the bottom part of your frame. (See mine for placement) Once you are happy with it Duplicate. Image>Flip then
Image>Mirror.
Next open your tube. I used the close up inside the frame above the paper. Had to resize a few times to get it where I liked it. Once you do that then I did Effects> Texture Effects> Blinds with a setting of
Width 6
Opacity 61
Color Black Horizontal and Light from left/top both checked
then I Layers> Merge> Merge Visible
Copy and paste your full size tube and place to the right (See mine for placement)
Layer> Duplicate and on the original I did Adjust>Blur>Gaussian Blur Radius 3 on the top one I did this on the right hand side of your PSP under layers where it says Normal with an arrow next to it I changed that to Soft Light.
Add what name you would like in a nice script font and add your artist information (A Must!!!) then Layer> Merge Visible
And you are all done! I hope you enjoyed doing my tutorial!
Hugs, Staci