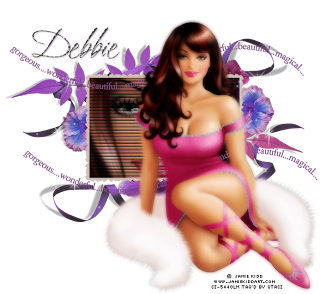
FTU Tutorial Magical....
Tube of choice. I used Jamie Kidd Tube from CILM Christmas Tube kit (www.cilm.com) You must have a license to use.
Scrap kit is Vix's No apologies (http://vixpsp.blogspot.com/) search under freebies She has such wonderful stuff that she shares. Thank you so much Vix!
Here we go!
Open a 600X600 New Canvas with Transparent Background
Open Vix_NAElement 7
Resize 85% bicubic checked
Copy and paste onto your new canvas
Using your magic wand
Mode-Replace
RGB Value
Tolerance and Feather at 0 Anti-alias checked
Click the inside of the frame
Selection>Modify>Expand 2
Using Vix_NAPaper9 copy (go ahead and close) and paste as a new layer
Selections>Invert Now at this point you need to make sure you are on the Paper 9 layer and hit Delete once on your keyboard
Selections> Select None and move the paper below the frame
This point is optional but I like sparkly, starry stuff LOL
Open Vix_NAElement 12 copy (go ahead and close) and paste as a new layer Move under the frame
Open Vix_NAElement 11 copy (go ahead and close) and paste as a new layer
Move it down to the bottom part of your frame (See mine for placement). Duplicate and Merge down. Duplicate again and move to the top part of frame (Again see mine for placement)
Open Vix_Element4 Copy (go ahead and close) and Paste as a new layer Move to the bottom part of your frame. (See mine for placement) Once you are happy with it Duplicate. Image>Flip then
Image>Mirror.
Next open your tube. I used the close up inside the frame above the paper. Had to resize a few times to get it where I liked it. Once you do that then I did Effects> Texture Effects> Blinds with a setting of
Width 6
Opacity 61
Color Black Horizontal and Light from left/top both checked
then I Layers> Merge> Merge Visible
Copy and paste your full size tube and place to the right (See mine for placement)
Layer> Duplicate and on the original I did Adjust>Blur>Gaussian Blur Radius 3 on the top one I did this on the right hand side of your PSP under layers where it says Normal with an arrow next to it I changed that to Soft Light.
Add what name you would like in a nice script font and add your artist information (A Must!!!) then Layer> Merge Visible
And you are all done! I hope you enjoyed doing my tutorial!
Hugs, Staci

No comments:
Post a Comment