Tuesday, August 28, 2012

PTU-Earth Goddess


PTU-Earth Goddess

Tube of Choice- I am using Camilla Drakenborg's Sacred Fay tube.  You
can purchase this and other beautiful artwork at UYA.

Scrapkit used is Earth Day by Foxys Designz *Thanks Ann!*.  You can
purchase this and other great kits at Digi Fox's Studio.

Mask used is Forum Mask 24 by Moonbeams and Spiderwebs.

Font used is Gingersnaps.

~~~~~~~~~~~~~~~~~~~~~~~~~~~~

Open a 600X250 Transparent New Image.

Open Paper2_FD Image Mirror and copy and paste as a New Layer.  Activate
the bottom layer, Selections Select All, Activate the paper layer, Image
Crop to Selection.

Open Paper5_FD and copy and paste as a New Layer.  Activate the bottom
layer, Selections Select All, Activate the paper top layer, Image Crop
to Selection.

Open your mask and with the top paper layer active, Layers New Mask Layer
from Image, Scroll to find your mask and hit the OK button.  Layers Merge
Merge Group.

Open your tube and copy and paste as a New Layer.  I moved mine down a
bit and to the right.  If happy how it looks, Activate the bottom layer,
Selections Select All, Activate the tubr layer, Image Crop to Selection.

Open Element3_FD and copy and paste as a New Layer.  I moved it down and
a little bit behind the tube.  I moved this down below the mask layer.
Once happy with your placement, Activate the bottom layer, Selections
Select All, Activate the tree layer, Image Crop to Selection.

Open Element4_FD and copy and paste as a New Layer.  I moved this into
the upper left hand side of the tag.  Activate the bottom layer, Selections
Select All, Activate the branch layer, Image Crop to Selection.

Open Element6_FD and copy and paste as a New Layer.  I moved this below
the tube layer and down and to the left.  Activate the bottom layer,
Selections Select All, Activate the flowers layer, Image Crop to Selection.

Open Element8_FD and copy and paste as a New Layer.  I moved this below
the mask layer.  Activate the bottom layer, Selections Select All,
Activate the leafy tree layer, Image Crop to Selection.

Open Element11_FD and copy and paste as a New Layer. I move this to the
upper right hand side of the tag and just above the mask layer.
Activate the bottom layer, Selections Select All, Activate the moon
layer, Image Crop to Selection.

Open ELement10_FD Image Resize 500X226 and copy and paste as a New Layer.
I moved this to the bottom left hand side and down below the branch layer.
Activate the bottom layer, Selections Select All, Activate the cloud layer,
Image Crop to Selection.

Open ELement21_FD and copy and paste as a New Layer.  I moved this down
a bit on the tag and then moved this down below the leafy tree layer.
Activate the bottom layer, Selections Select All, Activate the fence l
ayer, Image Crop to Selection.

Open Element28_FD Image Resize 200X215 and copy and paste as a New Layer.
I moved this to the left a bit.  Activate the bottom layer, Selections
Select All, Activate the bird layer, Image Crop to Selection.

Now to make the frame, Open Paper9_FD and copy and paste as a New Layer.
Activate the bottom layer, Selections Select All, Activate the top paper
layer, Image Crop to Selection.

Selections Select All, Selections Modify Contract 5 and hit the delete
key once on your keyboard.

Layers Merge Merge Visible.

Add your ©copyright information and name.

Monday, August 27, 2012

PTU-50 Shades of...


PTU-50 Shades of...

Tube of Choice-I am using the beautiful artwork of Jessica Dougherty.
You can purchase this and other wonderful artwork at CDO.

Scrap Kit used-I am using the matching scrap kit by LadyHawwk Designs
called Inspired by Jessica Dougherty 42-3 *Thank You Cathy!*.  You
can purchase this and other beautiful kits by LadyHawwk Designs at CDO.

Mask used is MB and SW Forum Mask 23 by Moonbeams and Spiderwebs.

Font used is Moonstone

*Optional* I used on the name I used Alien Skin Eye Candy 5 Impact:
Chrome.  You can use whatever you like.

~~~~~~~~~~~~~~~~~~~~~~~~~~~~~~~~~~~~~~~~

Open a 600X250 Transparent New Image.

Open LHD_IB-Dougherty-42-3-paper2 and copy and paste as a New Layer.
Activate the bottom layer, Selections Select All, Activate your paper
layer, Image Crop to Selection.

Open LHD_IB-Dougherty-42-3-paper6 and copy and paste as a New Layer.
Activate the bottom layer, Selections Select All, Activate your second
paper layer, Image Crop to Selection.

Open your mask, with the 2nd paper layer active Layers, New Mask Layer
from Image, Scroll to find your mask and hit OK.

Open LHD_IB-Dougherty-42-3-ele8, Image Resize 600X85 and copy and paste
as a New Layer.  I moved to the bottom of the tag, Layers Duplicate
Image Flip.

Open your tube of choice and copy and paste as a New Layer.  I moved
to the left.  Once you like where it is, Activate your bottom layer,
Selections Select All, Activate your tube layer Image Crop to Selection.
I Duplicated the tube layer and on the bottom layer I greyscaled the
tube (Adjust Hue and Saturation Colorize and made both numbers 0).  On
the top layer I did Adjust Blur Gaussian Blur 3.  I changed the blend
mode on the top layer to overlay.

Open LHD_IB-Dougherty-42-3-ele11 and copy and paste as a New Layer.
I moved this to the left hand side of the tag and moved under the mask
layer.  Activate your bottom layer, Selections Select All, Activate
the lace up layer, Image Crop to Selection.

Open LHD_IB-Dougherty-42-3-ele14 and copy and paste as a New Layer.
I moved this down so only part of the upper lip was showing.  Move this
below your mask layer.  Activate the bottom layer, Selections Select All,
Activate the lips layer, Image Crop to Selection.

Open LHD_IB-Dougherty-42-3-ele7 and copy and paste as a New Layer.
I moved this to the left behind the tube and moved below the mask layer.
Activate the bottom layer, Selections Select All, Activate the mirror
layer, Image Crop to Selection.

Open LHD_IB-Dougherty-42-3-ele1 and copy and paste as a New Layer.
I moved this to the right hand side of the tag.  Once happy with your
placement, Selections Select All, Activate the doodle layer, Image Crop
to Selection.

Open LHD_IB-Dougherty-42-3-paper3 and copy and paste as a New Layer.
Activate the bottom layer, Selections Select All, Activate the top
paper layer, Image Crop to Selection.  Now to make the frame.
Selections Select All Selections Modify Contract 5 and hit the Delete
Key once on your keyboard.

Layers Merge, Merge Visible.  Add your ©Copyright information and Name

Sunday, August 26, 2012

PTU-Dark Cinnamon


PTU-Dark Cinnamon

Tube of choice-I am using the beautiful artwork of Anna Marine.  You
can purchase this and other wonderful tubes at CDO.

Scrapkit used is Dark Cinnamon by Honored Scraps.  *Thanks you so much
Patty!  Beautiful kit!*  You can purchase this and other great kits at
Digi Fox's Studio.

Mask used is Mask 41 MB and SW by Moonbeam and Spiderwebs.

Font used is Northwood High.

~~~~~~~~~~~~~~~~~~~~~~~~~~~~~

Open a 700X700 Transparent New Image.

Open Element_36 and copy and paste as a New Layer.

Open your tube and copy and paste as a New Layer.  I used the bigger of
the 2 options.  Move to where you want it, activate your  frame layer
and with your magic wand click on the inside of your frame, Selections
Modify Expand 1 Selections Invert, Activate your tube layer and erase
what you don't want hanging over the frame.  When done, Selections Select
None.

Activate your frame layer again and with your magic wand click on the
inside of the frame.  Selections Modify Expand 5, Open Paper_13 and
copy and paste as a New Layer.  I moved it up so some of the background
would show.  Selections Invert and hit the delete key once on your
keyboard.  Selections Select None.  Move below the Frame.

Open Element_13 Image Mirror and copy and paste as a New Layer.  Move
down a bit.

Open Element_16 and copy and paste as a New Layer.  I moved this up and
to the left.  Move below the paper layer.

Open Element_17 and copy and paste as a New Layer.  I moved this up on
the tag.  Move above the clock layer.

Open Element_22 and copy and paste as a New Layer.  I moved this up and
to the right and moved this just above the cloud layer.  Layers Duplicate
Image Mirror/Flip.

Open Element_23 and copy and paste as a New layer. I moved this to the
left and down a bit.  Move below the paper layer.  Layers Duplicate
Image Mirror/Flip.

Open Element_26 and copy and paste as a New Layer.  I moved this below
the frame layer and moved down just a bit.  Once happy with how it looks
activate the paper layer Selections Select All Selections Float/Defloat
Selections Invert, Activate the fence layer and hit Delete once on your
keyboard.  Selections Select None.  I then Duplicated and Adjust Blur
Gaussian Blur 3 and hit OK.

Open Element_42 and copy and paste as a New Layer.  I moved this so it
is just above the cloud layer.

With the bottom layer active open Paper_09 and copy and paste as a New
Layer.  Open your mask, Layers New Mask Layer from Image, scroll till
you find your mask and hit ok.  Layers Merge Merge Group.

Layers Merge Merge Visible.  I like my tags 600X600 so I resized, added
my ©copyright info and name.

Monday, August 20, 2012

PTU-Enchanted Magic


PTU_Enchanted Magic

Tube of Choice- I am using the artwork of Jessica Dougherty.  You can
purchase this and other great artwork at CDO.

Scrapkit used is Enchanted by Hungry Hill *Thanks Alison*.  You can
purchase this and other great kits at CDO.

Font used is Bickham Script Fancy.

~~~~~~~~~~~~~~~~~~~~~~~~

Open a 700X700 Transparent New Image.

Open frame-3 Image Rotate Left/Right 90 degrees.  Image Resize 600X440.

With your magic wand click on the inside of the frame.  Selection
Modify Expand 10, Open paper-2 and copy and paste as a New Layer.
Move below your frame layer and hit the delete key once on your
keyboard.  Selections Select None.

Open your tube and copy and paste as a New Layer.  I have this on top
of the frame layer.

Open grass-mound and copy and paste as a New Layer.  Move this below the
frame layer and down.  Activate your paper layer Selections Select All,
Selections Float/Defloat Selections Invert, Activate the grass-mound
layer and hit the delete key once on your keyboard Selections Select
None.

Open mushrooms Image Resize 75X74 and copy and paste as a New Layer.
I moved to the bottom right hand side just below the frame layer.

Open leafglows and copy and paste as a New Layer.  I moved this down
to the bottom right and behind the mushroom layer.  Activate the paper
layer, Selections Select All Selections Float/Defloat Selections Invert,
Activate the leafglows layer and hit the delete key once on your keyboard.
Selections Select None(You might have to do a Crop to selection on this
layer depending on how nice your computer is being.)

Open leaf-fall and copy and paste as a New Layer.  I moved to the far
left and moved it so you could see a leaf or two on the left hand side
of the tube.  I duplicated twice more and moved so there would be different
leaves showing.  Once happy with your placement, Merge all your leaf-falls
together then activate your paper layer, Selections Select All, Selections
Float/Defloat Selections Invert Activate your leaf-fall layer and hit
the delete key once on your keyboard.  Selections Select None.  (You
might have to do a Crop to selection on this layer depending on how
nice your computer is being.)

Open tree-3 Image Resize 194X300 and copy and paste as a New Layer. I
moved to the far right and under the grass-mound layer.  Use the eraser
tool to get rid of any going past the frame layer.

Open tree-2 Image Resize 194X283 and copy and paste as a New Layer.  I
moved this below the tree-3 layer and to the far right.  Use the eraser
tool to get rid of any going past the frame layer.

Open tendril and copy and paste as a New Layer.  I moved this below the
leaf-fall layer and down so it was showing a little everywhere.  Activate
the paper layer, Selections Select All Selections Float/Defloat Selections
Invert activate the tendril layer and hit the delete key once on your
keyboard. Selections Select None.  (You might have to do a Crop to
selection on this layer depending on how nice your computer is being.)

Open WA-2 Image Resize 350X196 (you might need to sharpen the image a
bit so Adjust Sharpness Sharpen) and copy and paste as a New Layer. I
moved down so the word Magic was on the frame.  I also put a dropshadow
on this about 2-3 times.

I then resized this to 600X600 added my ©copyright information and Name.

Sunday, August 19, 2012

PTU-Supernatural


PTU-Supernatural

Tube os choice-I am using the artwork of Scarlet Gothica.  You can
purchase this and other great artwork at DSI.

Scrapkit used is Supernatural by Lins Creations *Thanks so much
Lins!  I love this kit!*  You can purchase this and other Great kits
at Scrappin Naturally.

Masks used are Forum masks 9 and 23 by Moonbeams and Spiderwebs.

Font used is Chic decay

~~~~~~~~~~~~~~~~~~~~~~~~~~

open a 600X250 Transparent New Image.

Open LC_Supernatural_papers(50) Image Resize 800X800 and copy and paste
as a New Layer.  I moved the paper down so the graveyard was in the
middle of the tag, Then I activated the bottom layer, Selections Select
All then activated the paper layer, Image Crop to Selection.

Open LC_Supernatural_papers(30) Image Resize 800X800 and copy and paste
as a New Layer.  Activate the bottom layer Selections Select All, Activate
this new paper layer Image Crop to Selection.  I then Opened Forum Mask
23 and then with this new paper layer active Layers New Mask Layer from
Image Scroll to find your mask layer and hit ok.

Layers New Raster Layer and flood fill with white.  Activate Forum mask
9 and with your floodfill layer active Layers New Mask Layer from Image
scroll to find your mask and hit ok.

Open LinsCreations_Supernatural_elements(1) Image Resize 800X313 and copy
and paste as a New Layer.  I moved down to the bottom of the tag and under
both mask layers.  Once happy with your placement activate the bottom
layer Selections Select All activate the cobble stone layer Image Crop
to Selection.

Open LinsCreations_Supernatural_elements(5) Image Resize 550X600 and copy
and paste as a New Layer.  I moved this to the upper right corner and
under both mask layer.  Once happy with your placement activate the bottom
layer Selections Select All activate the Rose layer Image Crop to Selection.

Open LinsCreations_Supernatural_elements(6) Image Resize 550X531 and
copy and paste as a New Layer.  I moved this to the bottom right corner
and moved below the 2 mask layer and under the rose layer. Once happy
with your placement activate the bottom layer Selections Select All
activate the Poppy layer Image Crop to Selection.

Open LinsCreations_Supernatural_elements(8) Image Resize 550X565 and
copy and paste as a New Layer.  I moved this down below the mask layers
and the 2 flower layer and a little to the right.  Once happy with your
placement activate the bottom layer Selections Select All activate the
daisy layer Image Crop to Selection.

Now for the frame layer. Open LC_Supernatural_papers(19) Image Resize
800X800 and copy and paste as a New Layer.  Activate your bottom layer,
Selections Select All, Activate your top paper layer, Image Crop to
Selection.  Now with that top paper layer active Selections Select All
Selections Modify Contract 5 and hit ok and hit the delete key once on
your keyboard. Selections Select None.

Add your ©copyright information and name and you are done!


Monday, August 13, 2012

PTU-Goth Puppy


PTU-Goth Puppy

Tube of Choice-I am using the adorable artwork of Karen Middleton.  You
can purchase this and other great tubes at CDO.

Scrapkit used is Rebel Dezigns matching scrapkit to this tube *Thank
You giZZy!!!  I really love this kit!*.  You can purchase this and other
great kits by Rebel Designs at CDO.

Fonts used are Northwood High and Carpenter ICG

~~~~~~~~~~~~~~~~~~~~~~~~~~~~~~~~~~~~

Open a 700X700 Transparent New Image.

Open your tube and copy and paste as a New Layer.

Open ScrapRD_KM-ele34 and copy and paste as a New Layer.  Move this
below your tube layer.

Open ScrapRD_KM-ele30 and copy and paste as a New Layer.  Move this
down and below your tube layer.

Open ScrapRD_KM-ele5 and copy and paste as a New Layer.  Move this below
the grass layer and to the bottom left so it is peeking out.  Layers
Duplicate and move to the upper right side.

Open ScrapRD_KM-ele12 Image Flip and move just above the skull flower
layer and to the right.  Layers Duplicate Image Mirror Image Flip.

Open ScrapRD_KM-ele23 and copy and paste as a New Layer. Move below the
grass layer and move so it is peeking out.

Open ScrapRD_KM-ele13 and copy and paste as a New Layer.  Move to the
left, Layers Duplicate and move to the right.  Layers Merge Merge Down
and move below the gate layer.

Open ScrapRD_KM-ele28 and copy and paste as a New Layer.  Move to the
left and below the grass layer. Layers Duplicate amd move this right and
up.

Open ScrapRD_KM-ele9 and copy and paste as a New Layer.  I moved this
up and to the right then moved below the gate layer.

Layer Merge Merge Visible.

I resized to 600X600 and added my ©copyright information.

With Northwood High I typed out Goth Puppy I then Selections Select All
Selections Float/Defloat added a new layer and filled with black.
I moved this below the original layer and  added a Gaussian Blur of 3.
I typed out my name in  Carpenter ICG. I stretched it a bit and then did
the Selection Select All Selection Float/ Defloat and added a lighter
color and moved below the original name layer. Then did Eye Candy Drip.


Friday, August 10, 2012

PTU-Flight of Fancy

PTU-Flight of Fancy

Tube of Choice-I am using the Beautiful Artwork of The Vintage Angel.
You can purchase this and other Beautiful Artwork at CDO.

Scrapkit used-I am using Crazy Carita's Inspired by The Vintage Angel 2-3
Kit, *Thank You Carita!*  You can purchase this and other Great Kits at
CDO.

Font used is Moonstone.

~~~~~~~~~~~~~~~~~~~~~~~~~~~~~~~~~

Open a 700X700 Transparent New Image

Open fr3 and copy and paste as a New Layer.

With your Magic Wand click on the inside of the frame.  Selections Modify
Expand 10.  Open paper1 and copy and paste as a New Layer.  Selections
Invert and hit the Delete Key once on your keyboard.  Selections Select
None.

Open your tube and copy and paste as a New Layer.  Layers Duplicate and
move below the Frame layer.  With your magic wand click inside your
frame, activate your top tube layer, Selections Invert and with your
eraser tool erase what is hanging over the frame.  Selections Select
None.

Open el6 and copy and paste as a New Layer.  I moved up and behind the
top tube layer.

Open el4 and copy and paste as a New Layer.  I moved this down and below
the clock layer.  I then used the eraser tool to erase what was hanging
below the frame.

Open el1 Image Rotate clockwise 90 and hit ok.  Copy and paste as a New
Layer.  I moved to the right and under the paper layer.  Layers Duplicate
Image Mirror.

Layers Merge Merge Visible.

Add your ©copyright info and Name.

For the name I typed it out and hit ok, then Selections Select All
Selections Float/Defloat and then opened paper4 and copy and pasted as
a New Layer, Selections Select None and then Deleted the original name
layer.

Tuesday, August 7, 2012

PTU-Tainted


PTU-Tainted

Tube of choice-I am using the gorgeous artwork of Amy Matthews.  You can
purchase this and other great artwork at CDO.

Scrapkit used-I am using Hungry Hill's Tainted Love Mini. *Thank You
Alison*  You can purchase this and other great kits at CDO.

Mask used is Moonbeams and Spiderwebs Forum Mask 23

Font used is Black Asylum

~~~~~~~~~~~~~~~~~~~~~~~~~~~~

Open a 600X250 transparent New Image.

Open paper-6 and copy and paste as a New Layer.  Activate the bottom
layer Selections Select All, activate the paper layer Image Crop to
Selection.

Open paper-10 and copy and paste as a New Layer.  I moved it down some
then activate your bottom layer Selections Select All, Activate the top
paper layer Image Crop to Selection.

Open your mask and with the top paper layer active Layers New Mask Layer
from Image, Scroll down to find your mask and hit ok.  Layers Merge Merge
Group.

Open your tube (I used a close up tube) and copy and paste as a New
Layer.  I moved to the right hand side of the tag.  Activate the bottom
layer Selections Select All, activate the tube layer Image Crop to
Selection.

Open dried-branch and copy and paste as a New Layer.  Move below your
mask layer.  Position where you want.  Activate the bottom layer Selections
Select All, activate the branch layer Image Crop to Selection.

Open Dead-flowers and copy and paste as a New Layer.  I moved this just
below the tube layer and down toward the bottom of the tag.  Once happy
with your placement, activate the bottom layer Selections Select All,
activate the paper layer Image Crop to Selection. Layers Duplicate and
on the bottom flower layer Adjust Blur Gaussian Blur 3%.

Open crystal, Image Mirror and copy and paste as a New Layer.  I moved
this below the flower layer.  Once happy with your placement, activate
the bottom layer Selections Select All, activate the crystal layer Image
Crop to Selection. Layers Duplicate and on the bottom crystal layer
Adjust Blur Gaussian Blur 3%.

Open jar and copy and paste as a New Layer.  I moved this behind the tube
and under the mask layer.  Play around to where you like it! Once happy
with your placement, activate the bottom layer Selections Select All,
activate the jar layer Image Crop to Selection.

Open bow-2 and copy and paste as a New Layer.  I moved this behind the
mask layer and to the upper left hand side of the tag.  Once happy
with your placement, activate the bottom layer Selections Select All,
activate the bow layer Image Crop to Selection.

Open fenceline and copy and paste as a New Layer.  I moved this down and
behind the mask layer.  Once happy with your placement, activate the
bottom layer Selections Select All, activate the fence layer Image Crop
to Selection.

Open bottle and copy and paste as a New Layer.  I moved this way up so only
a little of the bottom was showing and then moved under the mask layer.
Once happy with your placement, activate the bottom layer Selections
Select All, activate the bottle layer Image Crop to Selection.

Ok now to make the frame.  Open paper-8 and copy and paste as a New Layer.
Activate your bottom layer, Selections Select All Activate your top paper
Image Crop to Selection.  On that top paper layer Selections Select All,
Selection Modify Contract 5 and hit the delete key once on your keyboard.
and now you have your frame!!!

Layers Merge Merge Visible.

Add your ©copyright and name and you are all done!


PTU-The Masquerade


PTU-The Masquerade

Tube of choice-I am using the beautiful artwork of Amy Brown.  You can
purchase this and other great artwork at CDO.

Scrap Kits used-I am using Hungry Hills French White Mini and French
White add on *Thanks Alison!*

Font used Some Weatz

~~~~~~~~~~~~~~~~~~~~~~~~~~~~

Open a 700X700 transparent New Image

Open frame-2 and copy and paste as a New Layer.

With your magic wand click on the inside of your frame.  Open paper-4
and copy and paste as a New Layer.  Selections modify expand 5. Selections
Invert and hit the delete key once on your keyboard.  Move this below
your frame layer. Selections Select None.

Open your tube and copy and paste as a New Layer (I used the first tube).
Dupicate your tube and move the copy below the frame layer.  With your
eraser tool and the top tube layer active erase so you can see the frame
and erase what is below the frame.  Activate the bottom tube layer and
erase what is below the frame.

Open WA-3 Image Resize 350X350 and copy and paste as a New Layer. I moved
this to the upper left hand side of the frame and moved under the paper
layer then duplicated and moved to the bottom right hand side of the
frame.

Out of the add on kit, Open doodle-2 Image Resize 600X351 and copy and
paste as a New Layer.  I move this down toward the bottom of the tag.
Layers Duplicate  Image Mirror and move up toward the top of the tag.

Open Glimmer-2 and copy and paste as a New Layer.  I moved it down toward
the bottom of the top tube.  Once happy with your placement activate your
paper layer, Selections Select All Selections Float/Defloat Selections
invert and hit the delete key once on your keyboard. Do not Deselect.

Open glimmer-1 and copy and paste as a New Layer.  Move below your tube
layers so it is on your paper layer on either the left or right side.
Layers Duplicate Image Mirror Image Flip and then hit the delete key once
on your keyboard.  Activate the original glimmer and hit the delete key
once on your keyboard.  Selections Select None.

Open frond Image Resize 287X330 and copy and paste as a New Layer.  I
moved this to the upper right hand side of the frame.  Once happy with
your placement Layers Duplicate Image Mirror/Flip.

Open doodle-1 Image Resize 447X600 and copy and paste as a New Layer.
I moved this to the upper part of the frame and moved below the paper
layer.

Open doodle-3 Image Resize 363X600 and copy and paste as a New Layer.
I moved this toward the bottom right hand side of the frame and moved
below the paper layer.

Layers Merge Merge Visible.

Add your ©copyright info and name!


Sunday, August 5, 2012

PTU-Phantom Vision


PTU-Phantom Vision

Tube of choice-I am using the beautiful artwork of Anna Marine.  You
can purchase this and other beautiful artwork at CDO.

Scrapkit used is Saturnalia by Dees'Sign Depot.  *Thank You Dee!*  You
can purchase this and other great kits at Scrappin' Naturally.

Font used is Black Asylum.

~~~~~~~~~~~~~~~~~~~~~~~~~~~

Open a 700X700 Transparent New Image

Open DD_S_Element 54 Image Rotate Left/Right and copy and paste as a 
New Layer.

Open your tube of choice and copy and paste as a New Layer.  Adjust
to where you want your tube.

Open DD_S_Element 68 and copy and paste as a New Layer.  Move down to 
the bottom of the tube and frame.

Open DD_S_Element 67 and copy and paste as a New Layer.  Move down to 
the bottom of the tube and frame and covering the doodle.

With your magic wand, click on the inside of your frame, Selections
Modify Expand 10, Open DD_S_Paper 13 and copy and paste as a New Layer.
Selections Invert and hit the delete key once on your keyboard.  Selections
Select None.  Move the paper layer below the frame.

Open DD_S_Element 19 Image Resize 281X497 and copy and paste as a New
Layer.  I moved to the left hand side and moved below the paper layer.

I then opened the following elements and arranged under the paper layer,
DD_S_Element 18, DD_S_Element 53, DD_S_Element 56, DD_S_Element 60,
DD_S_Element 62.  You may want to use different elements but this is what
I used.

With your top layer active, Open DD_S_Element 61 Image Resize 497X283
and copy and paste as a New Layer.  Move to the bottom of you tube and 
frame Image Mirror and adjust to where you like it.  Once happy with 
your placement, Layers Duplicate and Image Flip Image Mirror move to where
you like it then Layers Arrange Send to bottom.

Layers Merge Merge Visible.

Add your ©copyright and name and you are done!


Saturday, August 4, 2012

PTU-Heaven

PTU-Heaven

Tube and Scrapkit used is The Vintage Angel with matching scrapkit by
Foxys Designz

Font used Bickham Script Fancy2

~~~~~~~~~~~~~~~~~~~~~~~~~

Open a 700X700 Transparent New Image

Open your tube and copy and paste as a New Layer.(I did the number 1 or
top tube)

Open Element8_FD and copy and paste as a New Layer.  Move this to the
bottom of your tube.

Open Element17_FD Image Resize 600X119 pixels and copy and paste as a
New Layer.  Move to the bottom of the tube and move under the flower
element.  Layers Duplicate Image Resize 400 pixels and hit OK.  Move
this to the top of the tube.

Open Element26_FD Image Resize 400X125 and copy and paste as a New Layer.
Move this to the top of the tube and the top of the ribbon.

Open Element29_FD Image Resize 112X400 and copy and paste as a New Layer.
Move to the Left hand side of the tube.

Open Element32_FD Image Resize 534X600 and copy and paste as a New Layer.
I move to the right and under the tube layer.

Open Element34_FD Image Resize 490X519 and copy and paste as a New Layer.
I moved this under the tube and to the right.  Layer Duplicate Image Mirror
and I moved this to the left and up slightly.

Open Element28_FD Image Resize 658X675 and copy and paste as a New Layer.
I had to play a bit but moved it to the left and up.

Open Element31_Fd and copy and paste as a New Layer.  I moved to the
left hand side of the tag.  Layers Duplicate and move one layer to the
bottom and with the top one use your eraser tool to get rid of the stem.

Open Element33_FD and copy and paste as a New Layer.  I moved this to
the right and under the tube layer.

Once happy with how the tag looks, Layers Merge Merge Visible.

Put on your ©Copyright and Name and you are done!

Friday, August 3, 2012

PTU-Enchanted One


PTU-Enchanted One

Tube of choice-I am using artwork by Jasmine Becket-Griffith!  You can
purchase this and other great artwork at CDO.

Kit used is Enchanted by Hungry Hills.  You can purchase this and other
scrapits at CDO.

Font used is Gingersnaps.

~~~~~~~~~~~~~~~~~~~~~~~~~~~~~~~~

Open a 600X250 Transparent New Image.

Open paper-1 and copy and paste as a New Layer.  I moved it down so
some of the pink showed on the left.  Once happy with your placement
activate your bottom layer Selections Select All, Activate your paper
layer Image Crop to selection.

Open your tube and copy and paste as a New Layer. I moved it to the
right.  Once you get it where you want it, activate your bottom layer
Selections Select All activate your tube layer Image crop to Selection.

Open doodle-1 and copy and paste as a New Layer.  Move below your tube
layer and activate your bottom layer Selections Select All, Activate
the doodle layer Image Crop to Selection.

Open grass-mound and copy and paste as a New Layer.  Move below your
tube layer and move down. I moved it to the left and down.  Once happy
with your placement Activate your bottom layer Selections Select All
activate the grass mound layer Image Crop to Selection.

Open leaf-fall and copy and paste as a New Layer.  Move below your tube
layer and to the left.  Once happy with your placement Activate your
bottom layer Selections Select All activate the leaf fall layer Image
Crop to Selection.

Open lantern-line and copy and paste as a New Layer.  Image Mirror and
Move this so you can see the smallest lantern.  Move below your tube
layer.  Once happy with your placement Activate your bottom layer
Selections Select All activate the lantern line layer Image Crop to
Selection.

Open tendril and copy and paste as a New Layer.  I moved just below the
tube layer and down and to the left.  Once happy with your placement
Activate your bottom layer Selections Select All activate the tendril
layer Image Crop to Selection.

Layers Merge Merge Visible.

Now we are gonna make a small frame.

Copy and Paste paper 12 as a New Layer.  Activate your bottom (What you
just merged) Selections Select All, Activate your paper layer Image
crop to selection.  Now on the paper layer Selections Select All Selections
Modify Contract 2 OK and hit the delete key once on your keyboard.

Merge this layer down, Add your ©copyright info and name and you are
done!

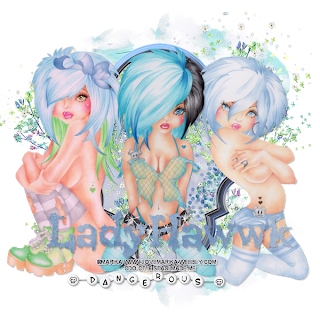
PTU-Dangerous

PTU-Dangerous

Tubes of Choice-I am using Package 5 of Marika's

Scrap Kit used-I am using the matching scrapkit made by LadyHawwk
Designs

Font used-Black Asylum

~~~~~~~~~~~~~~~~~~~~~~~~~~

Open a 700X700 Transparent New Image

Open ScrapLHD_Marika5-frame2 and copy and paste as a New Layer.

With your Magic Wand click on the inside of the frame, Selections
Modify Expand 5, Open ScrapLHD_Marika5-Paper7 and copy and paste
as a New Layer Selections Invert and hit the delete key once on
your keyboard.  Selections Select None.  Move the paper layer
down below the frame.

Open your tubes and copy and paste as new layers.

Open ScrapLHD_Marika5-ele2 and copy and paste as a New Layer. I moved
this to the bottom of the tubes.

Open ScrapLHD_Marika5-ele29 and copy and paste as a New Layer.  I moved
this below the frame layer and down on the tag.

Open ScrapLHD_Marika5-ele44 and copy and paste as a New Layer.  I moved
this up on the tag them moved below the frame and paper layer.  Play
around to see where you like it!  Once happy with your placement, I
duplicated and then Image Flip.

Open ScrapLHD_Marika5-ele45 and copy and paste as a New Layer.  I moved
this up on the tag and above ele 44.  Once happy with your placement,
I duplicated and then Image Resize 75% and moved the resized layer down.

This is what elements and papers I added, If you want more go ahead and
add them!  Once happy with your tag, Layers Merge Merge Visible.

Add your ©copyright info and name and you are done!

Here is what I did with the name, I used Black Asylum and just typed it
out and hit ok.  Then I Selections Select All Selections Float/Defloat
Opened ScrapLHD_Marika5-Paper8 and copy and pasted as a New Layer,
Selections Invert and hit the Delete Key once on my keyboard and that
is how I did it!

I'm Back!

With a little coaxing and a lot of cussing I was finally able to get psp put on this OLD computer so I wrote my first tut in forever and am about to post it!