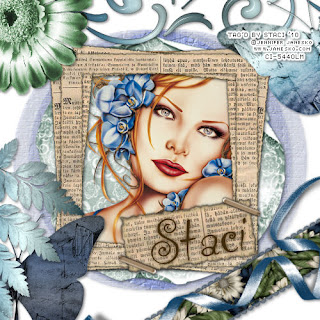
Remember When...
Artwork I used is a beautiful tube by the talented Jennifer Janesko
You can buy it at CILM
Scrap kit used is Genea's Notebook by the beautiful and talented Carita
You can Purchase it at MPT
Mask is by the ever talented Vix it is Vix_Mask11 which you can d/l from her
site vixpsp Under goodies
All set? Here we go!!!
Open a new image 500X500 Transparent
Open paper6 and copy and paste as a new layer
Layers> New Mask Layer from image and scroll down to find Vix_Mask11
Source luminance checked Inverted mask data unchecked and hit ok
Layers>Merge>Merge group
ok now here is what I did but you can go your own way if you want!
I opened up tagback 2 and resized 90% (Image>Resize>90%) and copy and pasted
it onto the mask layer
Open frame and copy and paste as a new layer
Open your tube and copy and paste as a new layer
Put it under you frame and resize to the size you like
Then I opened flower3 and put in the upper left hand corner (No resizing)
Then I opened butterfly1 Image>Free Rotate then checked Left and Free 30
All layers and Rotate single layer around canvas center unchecked and hit
ok I placed this in the upper right hand side (again no resizing)
Then I opened butterfly 2 and copy and pasted as a new layer and moved it
down on the bottom left hand side
I opened leaf1 and then did Image>Flip and then copy and pasted as a new
layer and moved it down over the butter fly on the lower left hand side
Then I opened ribbons and copy and pasted as a new layer then hit Image>
Free Rotate and then hit ok (should still be on the left free 30) and moved
the the lower right hand side
Then I opened doodle2 and copy and pasted as a new layer
I dragged it down under the green flower
Then I put a drop shadow of V and H 2 Opacity 40 blur 5 color black on
everything
Layers>Merge>Merge Visible
Now very important at this time you have to put your artist info in!!!
Use a scripty font to put your name on ( I duplicated the name and on the
original put a gaussian blur of 3 on it)
Either merge visible for transparent background or merge all for a white
background and that is it!!!
I hope you enjoyed doing this tut as much as I enjoyed writing it!
Thanks and many (((HUGS)))
Staci

No comments:
Post a Comment